Using Streamlabs for Professional Streams
Are you new to streaming or want to make your streams look more professional? Streamlabs is a great tool to help you do that. It is easy to use and comes with many powerful features. Whether you play games, host talk shows, or do live Q&A sessions, Streamlabs helps you create a polished and smooth stream without needing to be a tech expert.
In this guide, I’ll show you how to download Streamlabs, set it up, and use its features to make your stream stand out. You’ll learn how to add cool overlays, alerts, widgets, and more. Plus, I’ll share tips to improve your stream’s performance so your viewers have the best experience.
Getting Started: Download and Install Streamlabs
Step 1: Download Streamlabs
Go to streamlabs.com and download the Streamlabs Desktop app. It works on Windows, and there’s a beta version for Mac users.
Make sure you install it on your main drive (preferably an SSD). This helps the app load faster and run smoothly.
Step 2: Log In to Your Streaming Platform
After installing, open Streamlabs and log in with your Twitch, YouTube, Facebook Live, or other streaming accounts.
Use the OAuth login option to connect safely. Allow Streamlabs permission to manage chat, alerts, and other features for you.
Streamlabs Setup Wizard: A Simple Start
When you open Streamlabs for the first time, it will guide you through a setup wizard. This helps you quickly set everything up.
- Choose what type of stream you want to do — gaming, chatting, creative art, etc.
- Import settings if you already use OBS Studio.
- Select your microphone and webcam.
- Let Streamlabs adjust your settings based on your computer and internet speed.
This wizard is perfect for beginners but also saves time for experienced streamers.
Best Streamlabs Settings for High-Quality Streaming
Output Settings

Go to Settings > Output:
- Choose Simple mode if you’re just starting. Pick Advanced if you want more control.
- Use the NVENC encoder if you have an NVIDIA graphics card. It helps your stream look great without slowing down your computer. Otherwise, use x264, which uses your CPU.
- Set your bitrate according to your internet speed:
- For 720p at 60fps: 3000–5000 kbps
- For 1080p at 60fps: around 6000 kbps
- Keep the keyframe interval at 2, as most streaming sites require this.
- Choose Quality or Max Quality preset for the best look.
Test your internet speed at speedtest.net to see what bitrate your upload speed supports.
Video Settings
Go to Settings > Video:
- Set your Base (Canvas) Resolution to your monitor’s size, usually 1920×1080.
- Pick your Output (Scaled) Resolution. Use 1280×720 if your PC can’t handle 1080p smoothly.
- Choose the Lanczos filter for the best image quality when scaling.
- Select your FPS (frames per second): 30 fps is okay, but 60 fps is smoother for games.
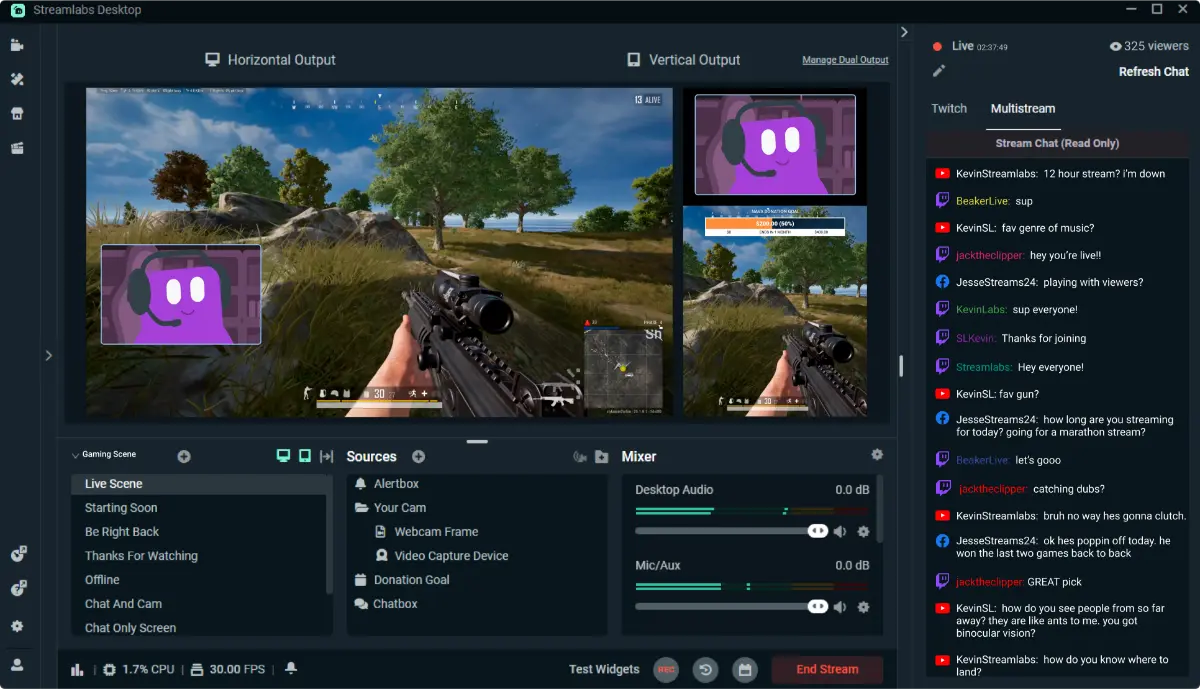
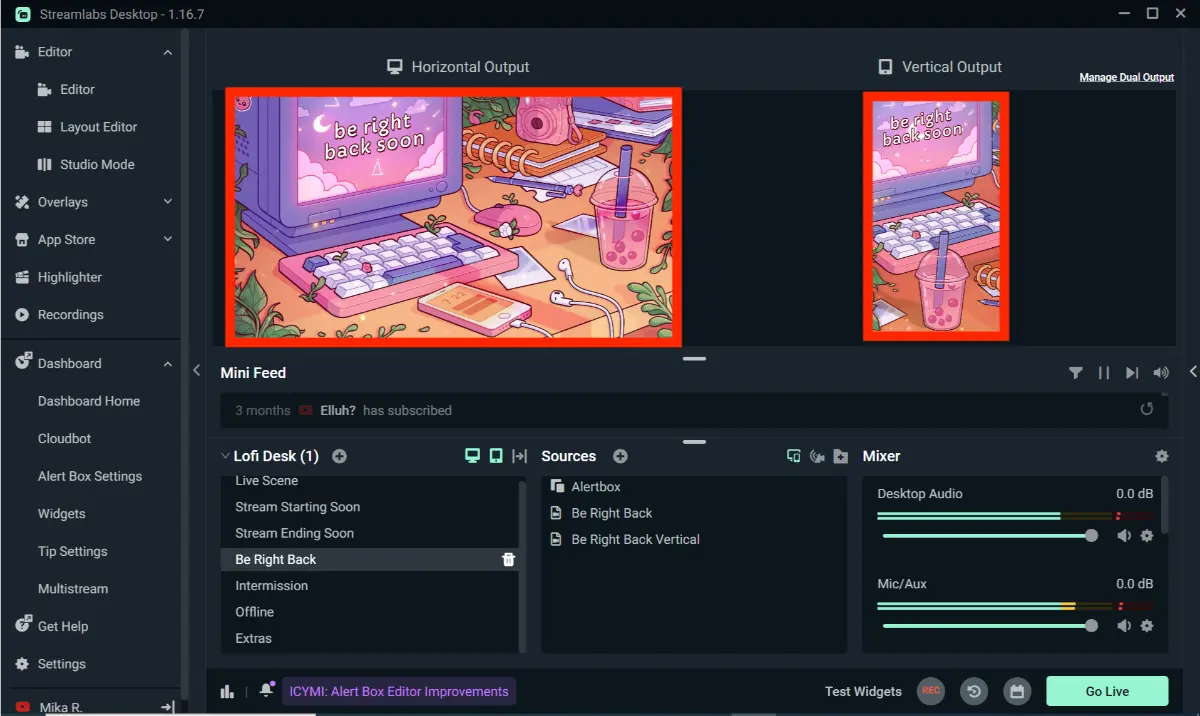
Creating Your Stream Scene in Streamlabs
Scenes and Sources
Scenes are your different stream layouts. For example, one scene for gameplay, another for chatting, and a “Be Right Back” screen.
Sources are the parts of each scene — like your webcam, game, images, or alerts.
Make multiple scenes for different parts of your stream. Use hotkeys to switch between them quickly.
Adding Sources
Click the “+” button in the Sources box and add:
- Game Capture or Display Capture to show your game or desktop.
- Video Capture Device for your webcam.
- Audio Input/Output for your microphone and desktop sounds.
- Image or Media Source for overlays, logos, or videos.
- Browser Source to show chat boxes, alerts, or donation widgets live.
Drag and drop these sources in the editor to arrange them how you want.
Customize Your Stream Look and Feel
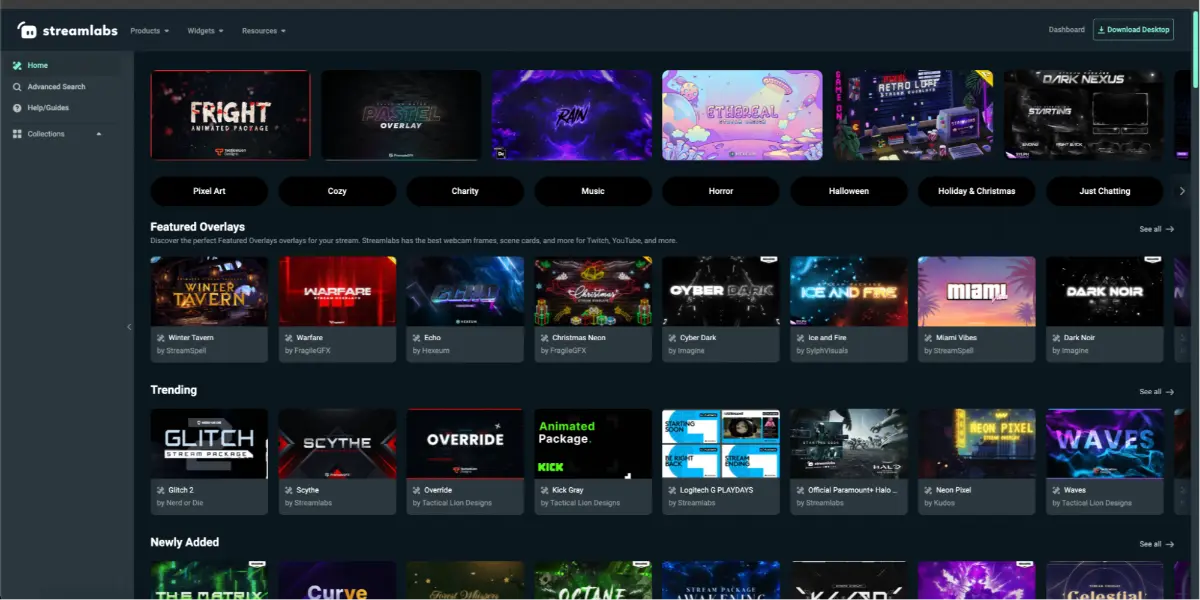
Use Streamlabs Themes
Streamlabs has a library of free and paid themes that include overlays, alerts, and widgets all in one package.
Pick a theme that fits your style — retro, modern, or clean — and install it with a few clicks.
Stream Labels
Stream labels show live info like your latest follower, top donor, or subscriber count.
Go to Widgets > Stream Labels and customize the fonts, colors, and animations to match your brand.
Add a Chat Box
Adding a chat box to your stream shows live chat messages. This helps viewers feel involved and lets people watching later see what was said.
Alerts and Widgets to Engage Your Audience
Alerts
Alerts pop up when someone follows, subscribes, donates, or raids your channel.
Go to Widgets > Alert Box to customize sounds, images, and messages. You can also set minimum donation amounts to avoid spam.
Donation Setup
Link your PayPal or other payment accounts under Settings > Donation Settings.
Set up thank-you messages and track donations right inside Streamlabs.
Goal Widgets
Show progress bars for follower goals, donation goals, or subscriber counts. This motivates viewers to support you and adds excitement to your stream.
Advanced Features for a Professional Stream
Cloudbot
Cloudbot is Streamlabs’ built-in chatbot. It helps by moderating chat, blocking spam, adding custom commands, and running giveaways.
This keeps your chat friendly and fun.
Stream Schedule and Social Links
Add panels or popups showing your streaming schedule, social media links, or Discord invites. You can even add countdown timers before going live.
Multistream (Premium)
Streamlabs Prime subscribers can stream to Twitch, YouTube, and Facebook at the same time.
This helps you reach more people and grow your channel faster.
Monitor Your Stream Performance
Stats Panel
Keep an eye on bitrate, dropped frames, CPU usage, and stream time to avoid problems during your broadcast.
Test Your Stream
Use the Record option to test your scenes, audio, and alerts before going live. You can also stream privately to YouTube to watch your stream as a viewer and make improvements.
Final Thoughts: Stream Like a Pro from Day One
You don’t need expensive gear or tech skills to create a great stream. Streamlabs makes it easy for anyone to start streaming professionally.
From easy setup to cool themes, alerts, and helpful tools, Streamlabs has everything you need to look good and keep your viewers engaged.
So, what are you waiting for? Open Streamlabs, hit “Go Live,” and share your passion with the world!